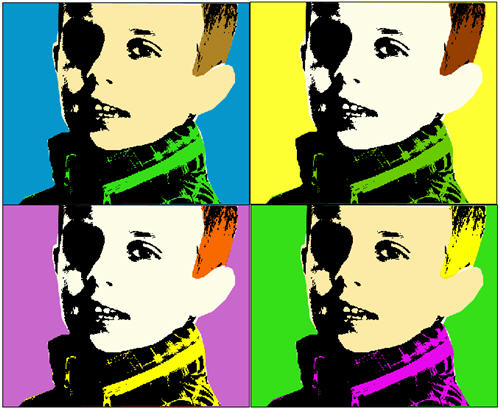
Many people find Andy Warhol’s pictures fascinating. I personally don’t like them that much, but still feel attracted by the bright colors he used in his famous portraits of Elizabeth Taylor and Marilyn Monroe. We can’t certainly teach you an Art lesson here, but I can at least show you how to apply an Andy Warhol effect to your pictures.
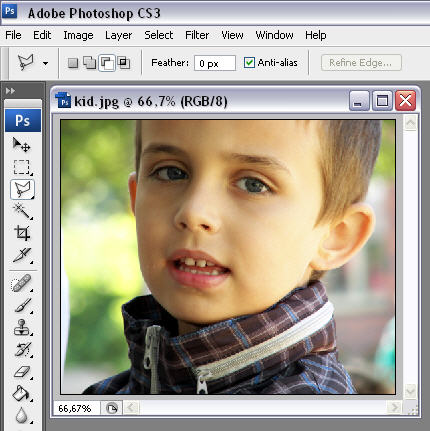
1. Start by opening up the photo you want to customize. The ones that work better are those with strong edges (so that we can easily cut the background out) and where the subject is looking at the camera.
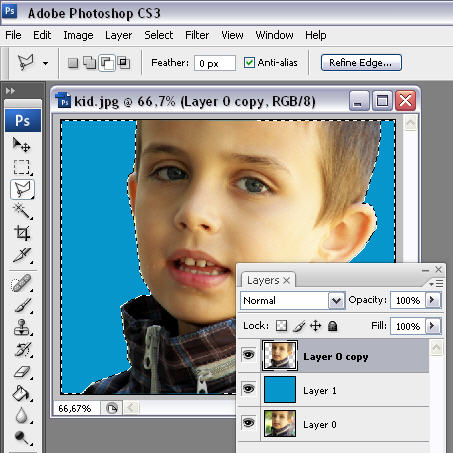
2. Duplicate the main layer by pressing Ctrl+J. In this newly created layer, select the background of the picture with the Polygonal Lasso tool and erase it. Then create another layer between those two and fill it with any color.
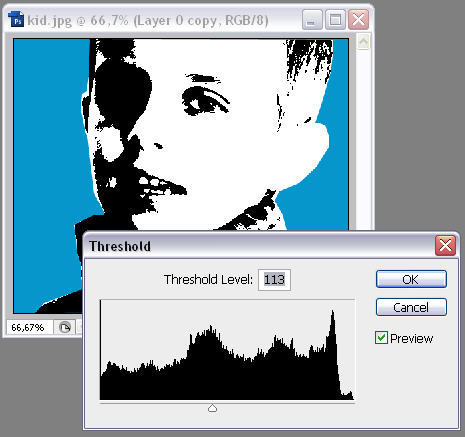
3. Select the background copy layer and click on Image > Adjustments > Threshold. Move the slider until you can only see the main shapes in the picture.
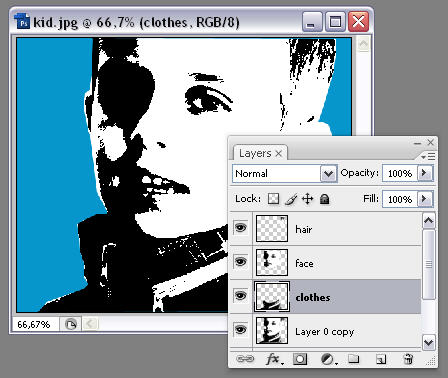
4. Now it’s time to separate each are you want to colorize (air, face, clothes, etc.). Select each one from the main layer copy and paste them on a new layer each. Name those layers accordingly so you know where you are working on.
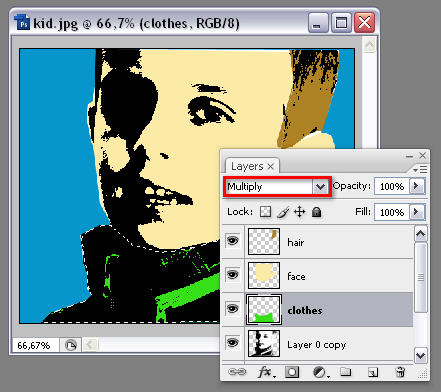
5. Let’s add some color! Select any of those layers you just created, press Ctrl while clicking on its thumbnail to select the area and then go to Edit > Fill. Select “color” in the drop-down menu and choose your favorite color. Press OK and then change the layer’s blending mode to Multiply.
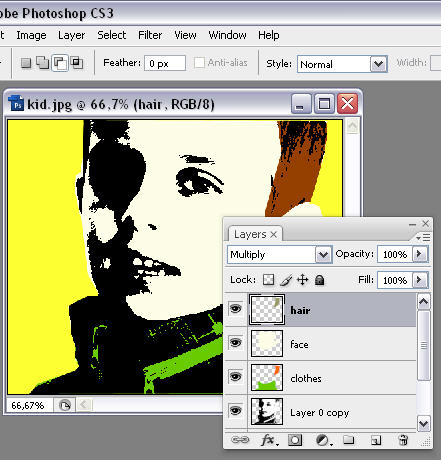
6. Repeat the last step with every area you want to colorize, and you’ll eventually have your very first Warhol-style portrait.
7. Now just repeat the last two steps with different colors, and combine all of them into a single file. Your work of pop art is finished.